Monday, April 14, 2014

Titanium-alloy-framework-tutorial-3

APPCELERATOR TITANIUM TUTORIAL PART 3 – DYNAMIC LAYOUT

On the last part of the tutorial we created Views using the Alloy markup. Now we will try to create a View using the hard way and you have to decide which way do you prefer. Using the xml or using the .js file ?
 1) Open MyFirstProject/app/controller/index.js delete all the codes. Run the app and you will see something like this:

                      *stuck in the splash screen?
Of Course because we deleted “$.index.open();” which opens the Alloy markup or the index.xml. Because of that we must create it programmatically.
2) Open index.js and write this code.
 var container = Ti.UI.createWindow({
                  backgroundColor: ‘white’
                 });
container.open();
Now if you run your app, did it display a white screen? how did that work?
we just simply convert:
 3) Let’s create the 3 Views:
var container = Ti.UI.createWindow({
          backgroundColor: ‘white’,
          layout: ‘vertical’
});
var container = Ti.UI.createWindow({
       backgroundColor: ‘white’,
       layout: ‘vertical’
});
var view_image = Ti.UI.createView({
       top: ’10%’,
       width: ’100%’,
       height: ’35%’,
       backgroundColor: ‘#4B0082
‘});
var view_welcomeMessage = Ti.UI.createView({
     width: ’100%’,
     height: ’10%’
});
var view_buttons = Ti.UI.createView({
    layout:”vertical”,
    top: “3%”,
    height: ’50%’
});
container.add(view_image);
container.add(view_welcomeMessage);
container.add(view_buttons);
container.open();
First we created the three views then we add it on the container and then open the container. As you notice here:
It’s almost the same, It’s just that we are not using index.tss to customize our Views, we just insert the properties inside the parameter or “ myView({ property:’value’ ’’}); ”.
4) Let’s create an ImageView then add it to the view_image:
//creating imageview
var img_logo = Ti.UI.createImageView({
      width: ’100%’,
      height: ’100%’,
      image:’/image/f_logo.png’
});
//adding the imageView to the view_image
view_image.add(img_logo);
5) Let’s create a Label and add it to the view_welcomeMessage:
//label
var lbl_welcomeMessage  = Ti.UI.createLabel({
     text:’Welcome to my first cross platform app using Appcelerator Titanium’,
     textAlign: “center”,
     font:{ fontFamily:’Georgia-Italic’ }
});
//add to the view_welcomeMessage
view_welcomeMessage.add(lbl_welcomeMessage);
6) Let’s create Buttons and add it to the view_buttons:
//creating buttons
var btn_lFacebook = Ti.UI.createButton({
      height:”18%”,
      backgroundColor: “#87CEFA”,
      width: “60%”,
      title: ‘Log in with Facebook’
});
var btn_lGmail = Ti.UI.createButton({
      top: “4%”,
      height:”18%”,
      backgroundColor: “red”,
      width: “60%”,
      color: “white”,
      title: ‘Log in with Gmail’
});
var btn_createAccount = Ti.UI.createButton({
      top: “4%”,
      height:”18%”,
      backgroundColor: “#F0F8FF”,
      width: “60%”,
      title: ‘Create an account’
});
//adding it to the view_buttons
view_buttons.add(btn_lFacebook);
view_buttons.add(btn_lGmail);
view_buttons.add(btn_createAccount);
run the project and you will see something like this:

Conclusion: Creating Views using xml is a lot easier  than creating it dynamically or programmatically. But sometimes creating Views dynamically gives us an advantage especially when displaying a complex data. For example if you will retrieve a lot of data and display it on a TableView row, it is a lot easier creating it dynamically with the use of a loop,in that case your row will be created repeatedly rather than creating it using xml one by one.
Stay tuned for our next tutorial.
- See more at: http://blog.foolprooflabs.com/2014/02/appcelerator-titanium-tutorial-part-3-dynamic-layout/#sthash.L5aJm5bK.dpuf

Titanium - Alloy Framework tutorial-2

PPCELERATOR TITANIUM TUTORIAL PART 2 – LAYING OUT USING ALLOY

Hello! Welcome to the second part of our tutorial about Apccelerator Titanium.
In our previous tutorial we tackled the importance and installation of Appcelerator Titanium now we will tackle how to layout in Appcelerator Titanium.
The most popular Titanium framework is Alloy which follows the MVC architecture pattern. What is MVC? MVC stands for “Model-View-Controller”. This pattern divides the application to three interconnected parts and those are:
  • Model (*consists of application data)
  • View (*outputs representation of information)
  • Controller (*glue between model and view)

But for now let’s focus more on Views, which are important because they are the graphical representation of your application. There are two ways of creating a view.  One is by creating using XML and the other one is by manually coding it. Let’s go first using XML:
  • Window (*an empty drawing space or a container)
  • View (*an empty drawing space or a container, commonly used for grouping widgets)
Commonly used widgets:
  • <Button></Button>
  • <Label></Label>
  • <TextField></TextField>
  • <ImageView></ImageView>
We will create something like this:

Now enough talk let’s begin.
***Delete all the codes inside index.xml that can be found on MyFirstProject/app/views
1) All XML Alloy markup must be inside the <Alloy></Alloy> tag:
<Alloy>
</Alloy> 
2) Create an empty container by using <Window></Window> assign a reference id equal to  “container” so that we can access it later by calling its id:
<Alloy>
           <Window id=”container”>
           </Window>
</Alloy>
 3) Open index.tss that can be found inside MyFirstProject/app/styles and let’s customize the window we just created, replace it all by this:
“#container”:{
backgroundColor: ‘white’,
layout: ‘vertical’
}
It’s like customizing using CSS. First we put the reference id and then put it inside the “ #yourId ”.
Second we add “:{ }” and put all the attributes inside the curly braces and separate the attributes by comma.
4) Run the app and you will see something like this:
*an empty container with white background
5) Let’s add a view by adding <View></View> tag and assign reference id equal to “view_image”:
<Alloy>
     <Window id=”container”>
            <View id=”view_image”>
            </View>
      </Window>
</Alloy>
 6) Go to index.tss and customize the view:
“#view_image”:{
     top: ’10%’,
     width: ’100%’,
     height: ’35%’,
     backgroundColor: ‘#4B0082′,
     layout: ‘vertical’
}
*All child tags will follow the attributes of the parent tag:
We set the margin top 10% below the top of the parent tag and that is the “#container”. We specify the width and give the 100% width value of the “#container”, specify the height and give a 30% height value of the “#container” and finally we set the background color of the view to ‘#4B0082’ hexa value of indigo.
7) Lets add an image file inside the MyFirstProject/app/assets/images and show that image inside the “#view_image” by adding <ImageView/> and assign a reference  id equal to “img_logo”:
<Alloy>
       <Window id=”container”>
               <View id=”view_image”>
                     <ImageView id=”img_logo”/>
               </View>
       </Window>
</Alloy>
8) Go to index.tss and customize the ImageView:
“#img_logo”:{
    width: ’100%’,
    height: ’100%’,
    image:’/image/f_logo.png’
 }
We specify the width and give the 100% width value of the “#view_image”, specify the height and give a 30% height value of the “#view_image” and finally we set the image path of it “/images/f_logo.png’ ”. You can see something like this:

9) Let’s add another view and assign an reference id = “view_welcomeMessage”:
 <Alloy>
            <Window id=”container”>
                          <View id=”view_image”>
                                   <ImageView id=”img_logo”/>
                          </View>
                         <View id=”view_welcomeMessage”>
                         </View>
             </Window>
</Alloy>
8) Go to index.tss and customize the View:
 ”#view_welcomeMessage”:{
       width: ’100%’,
       height: ’10%’,
       backgroundColor: ‘#4B0082’
 }
The added view will be positioned below the “#view_image” because the layout style that we chose for the “#container” is vertical so all the children will be vertically aligned.We changed the background color so that we can see the size of our view. You can see something like this:
9) Insert  <Label></Label> tag inside the “#view_welcomeMessage”:
<Alloy>
        <Window id=”container”>
               <View id=”view_image”>
                      <ImageView id=”img_logo”/>
               </View>
              <View id=”view_welcomeMessage”>
                  <Label id=”lbl_welcomeMessage”>Welcome to my first cross platform app using Appcelerator Titanium
                  </Label>
              </View>
        </Window>
</Alloy>
10) Go to index.tss and customize the Label:
“#lbl_welcomeMessage”:{
        textAlign: “center”,
        font:{ fontFamily:’Georgia-Italic’ }
}
11) Let’s add another view for buttons and add three buttons there by adding <Button></Button> tag:
<Alloy>
        <Window id=”container”>
              <View id=”view_image”>
                    <ImageView id=”img_logo”/>
             </View>
             <View id=”view_welcomeMessage”>
                   <Label id=”lbl_welcomeMessage”>Welcome to my first cross platform app using Appcelerator Titanium
                   </Label>
            </View>
            <View id=”view_buttons”>
                   <Button id=”btn_lFacebook”>Log in with Facebook</Button>
                   <Button id=”btn_lGmail”>Log in with Gmail</Button>
                   <Button id=”btn_createAccount”>Create an account</Button>
           </View>
        </Window>
</Alloy>
11) Go to index.tss and customize the View and the Buttons:
//view
“#view_buttons”:{
 layout:”vertical”,
 top: “3%”,
 height: ’50%’
}
//buttons
“#btn_lFacebook”:{
    height:”18%”,
    backgroundColor: “#87CEFA”,
    width: “60%”
}
“#btn_lGmail”:{
    top: “4%”,
    height:”18%”,
    backgroundColor: “red”,
    width: “60%”, color: “white”
}
“#btn_createAccount”:{
     top: “4%”,
     height:”18%”,
     backgroundColor: “#F0F8FF”,
     width: “60%”
}
I believe you  already knew it so no need for me to explain. I know you’re a genius :D remove the backgroundColor of “#view_welcomeMessage” and run your app you will see something like this:
Thank you for reading this tutorial, stay tuned for our next tutorial about laying out using JS.
- See more at: http://blog.foolprooflabs.com/2014/02/appcelerator-titanium-tutorial-part-2-layouting-using-alloy/#sthash.CQ9oiD0B.dpuf

titanium-alloy-framework-tutorial-1

APPCELERATOR TUTORIAL PART 1 – FIRST STEP TO APPCELERATOR TITANIUM

Do you want to be an Android and iOS developer using your web skills?Or are you sick of creating mobile applications that can only run on one mobile platform? Worry not, because Appcelerator Titanium is here to save your day.
What is appcelerator titanium?
It is an open, extensible development environment for creating beautiful native apps across different mobile devices and OSs including iOS, Android, and BlackBerry using web technologies with a few line of codes.
Why use appcelerator titanium instead of native languages?
Using titanium is for lazy developers like me who want to develop a powerful and useful cross platform mobile applications using web technologies and less codes. Here are the advantages of using titanium:
  • Open Source
  • Rapid Prototyping
  • Multi-platform development
  • Easy to layout (*compared to native android and iOS)
  • Downloadable modules (*work by other developers that can be adapted)
  • Javascript based (*A language that many developers already know)
  • CSS layouting (*CSS for customizing views and widgets)
  • Growing Community
Now you know all the advantages of appcelerator titanium, are you excited to create your first multi platform application that can bring millions of dollars into your life? Just take a deep breath, relax and scroll down and I will guide you through your first step into Appcelerator Titanium:
1) Downloading and Installing Titanium
Go to their official website http://www.appcelerator.com/developers/ and click download titanium for free, then install and follow the instructions there. It is very easy to install but requires high speed internet so that you will not encounter problems. 
2) Creating a project.
Go to File -> New -> Mobile App Project  Choose Default Alloy Project and click next.  
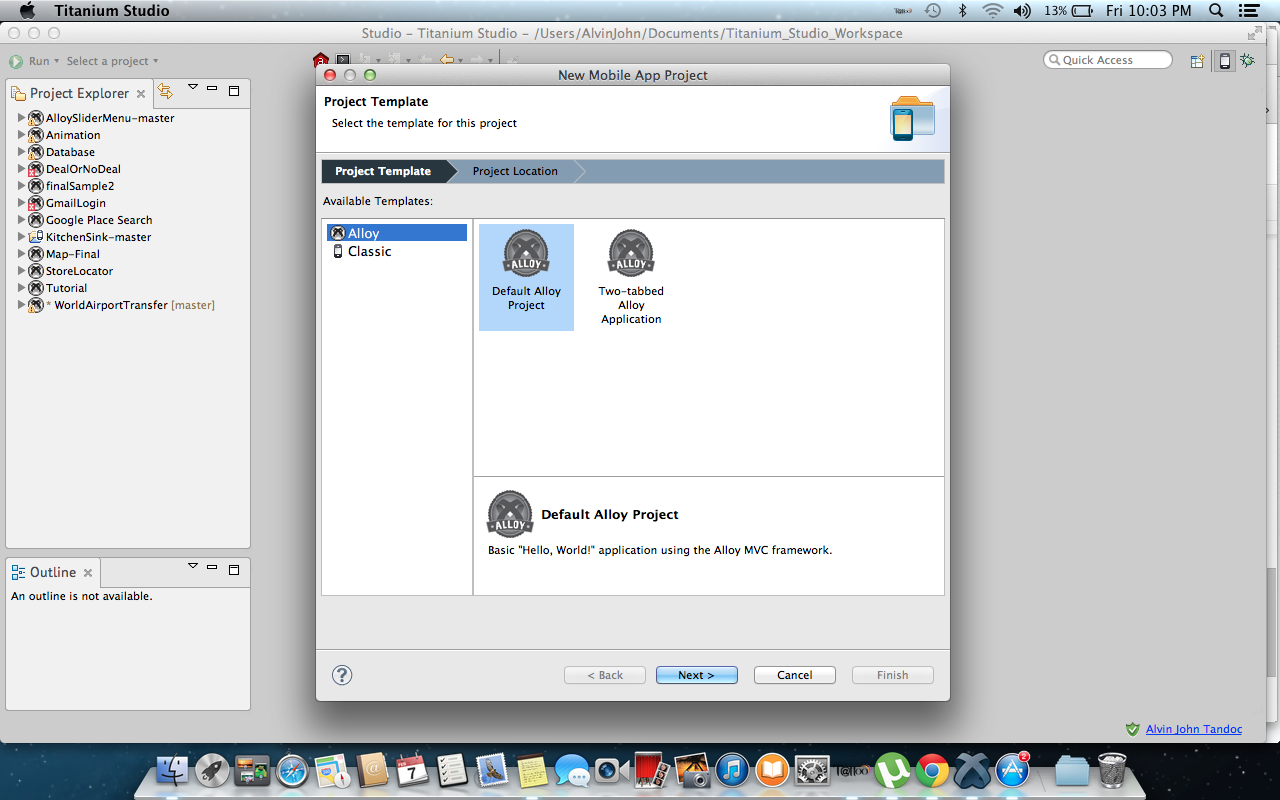
Fill up the necessary fields and click finish.
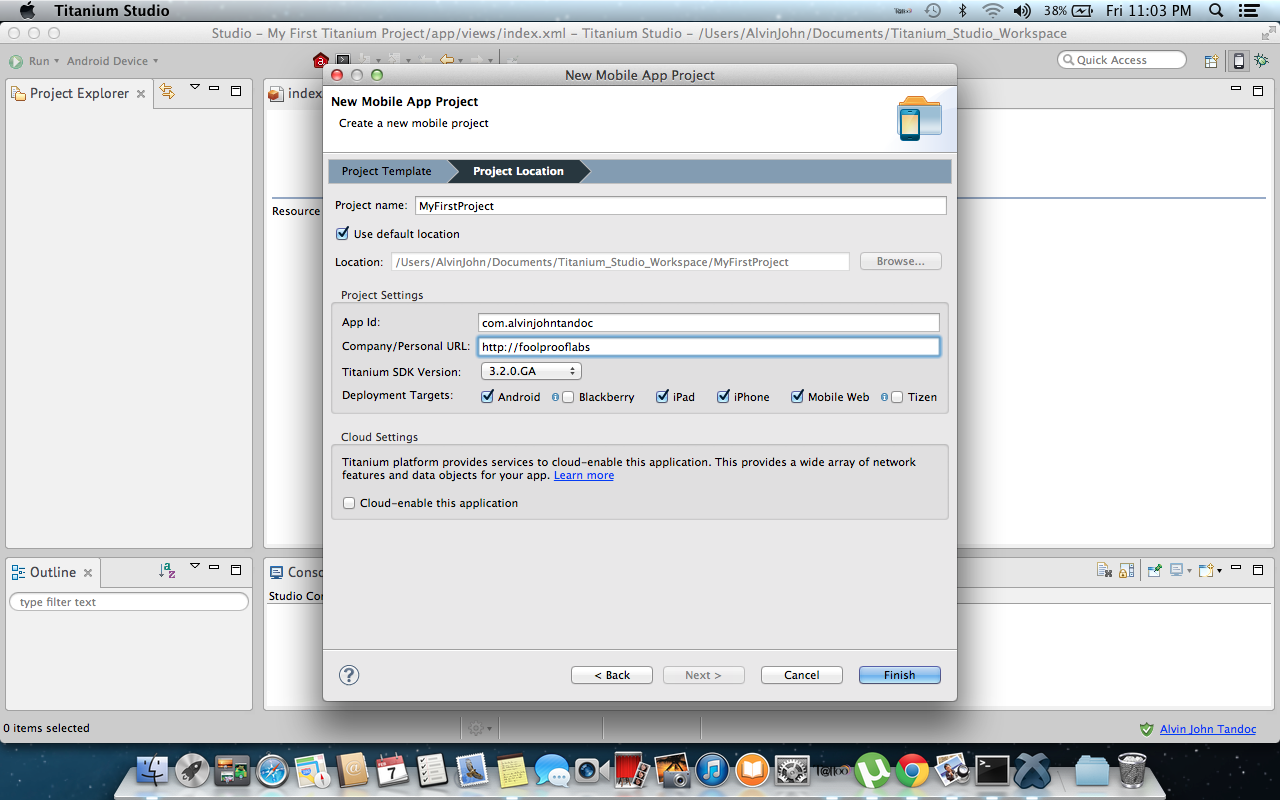
  4) Run your App.
To run your app in android go to the upper left of the studio window click the dropdown that indicates the possible devices that you can test your app. Select Android Emulator if you want to run it using emulator but if you want to run it using real device select Android device. We will choose Android Emulator right now.
*Android emulator is so slow instead of using android emulator use genymotion but if you want to use android emulator run this command to your terminal or cmd titanium config android.emulatorStartTimeout 1000000 
To run your device using IOS simulator, it’s the same procedure just select the iOS simulator.
*running the app using ios and android at the same time.
 
*** Better IDE of coding titanium is by using sublimetext2 and running or compiling your app using terminal or cmd.
To use Sublime follow the following steps.
  • Create your project using titanium studio then close titanium studio
  • Open your project using sublime
  • Install the package control for Titanium appcelerator (*optional)
  • To run your app open the terminal/cmd and go to the project root directory
  • Type  ”titanium build ––platform ios” for ios and “titanium build ––platform android” for android
  • Don’t forget to type in your terminal/cmd the titanium config android.emulatorStartTimeout 1000000 because android emulator is very slow to respond.
Using sublimeText2 for coding titanium  *
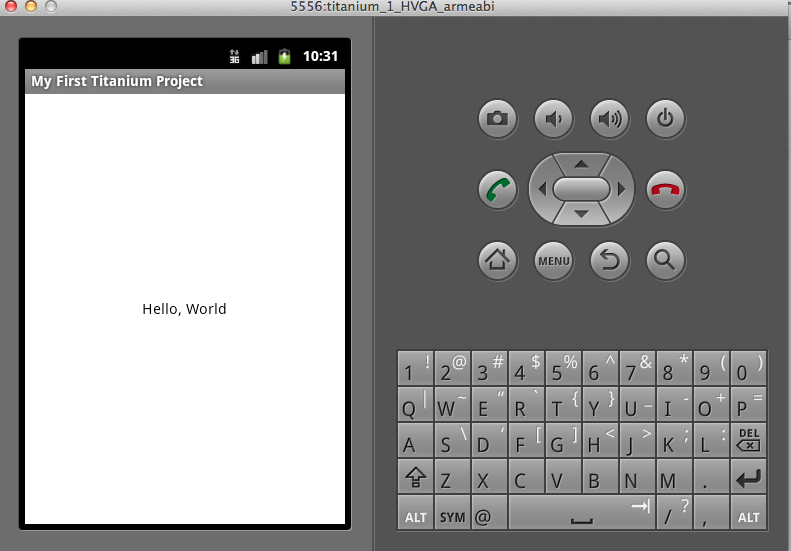
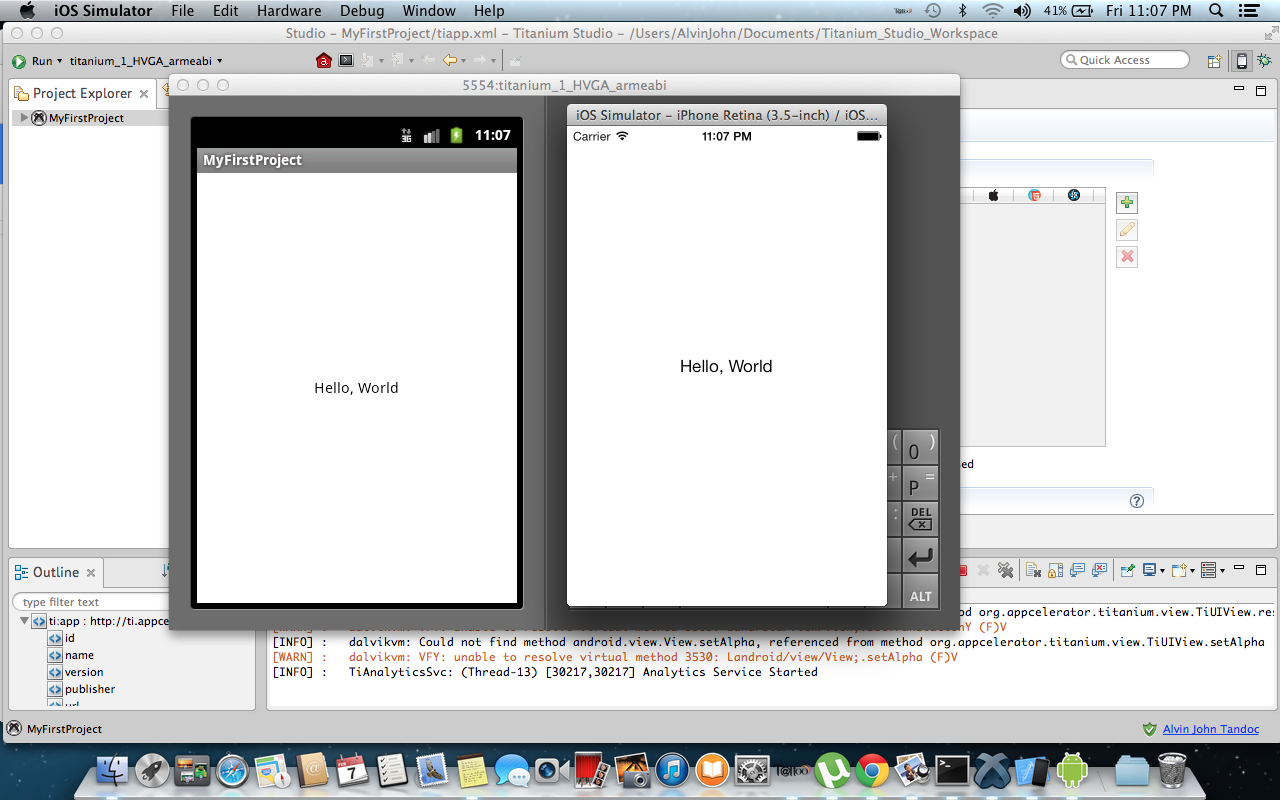
If you’re not using a Mac you cannot download Xcode and in that case you can’t run your project in iOS simulator. The remedy is to copy your project and find a Mac and compile your project there. Cheers now you run your app in IOS and Android at the same time without writing any line of codes. On the next tutorial I will guide you on how the code structure of appcelerator titanium works. Stay tuned good day everyone.
- See more at: http://blog.foolprooflabs.com/2014/02/first-step-appcelerator-titanium/#sthash.8BMmBIWi.dpuf